Showing posts with label other Felt Stuffs. Show all posts

Monday, 26 August 2013

Felt Photo Frame


Today, I'm going to post about my newly done project - magnet felt photo frame. I have always wanted to try this and am so happy with the outcome  (^_^) that i make another one right after i finished the first one. Here's how i make them...


 1. Cut 2 pieces of felt - according to the size of your photo. My photo was an A4 size so i added
     another 1 inch around the photo as the frame border.
 2. Then on 1 piece cut out the middle part slightly smaller than the photo so that the photo will
     stay put. This will be the front piece.
 3. Using craft glue, i glued a transparent cover (can be found at any bookstore ) onto the front
     piece. ( Notice that the hole is slightly smaller than the A4 transparent cover )


4. When the glue had dried, put the front and back piece together ( the side showing the glue face
    inside ) and sew the sides as shown by the yellow dotted lines. This is to ensure that the photo
    will stay in place. Sew up the other 2 sides but only on the front piece so you will have an
    opening to insert the photo later.


5. Next is the fun part - assemble the little designs that you want! I've cut out pieces of felt
    to make a bus, plane, hot air balloon, trees, heart shapes and little clouds. Sew them on the front
    piece. Lastly, sew up all sides except your opening to insert the photo of course and glue some
    magnets to the back.


This is how it look like when done.


I also did a flower one with a little bee and ladybug as shown below.


Loved them! ^.^


Tuesday, 14 May 2013

I've been Bitten by the Lazy Bug... & a Watermelon Pencil Case

Hah, I'm back... finally. Caught the lazy bug flu after the holidays (hehehe >_< )


I've been 'lepaking' around and getting excited with the 505 election news and reports. Everyone was so excited about it and seriously, this is the very first time i felt a sense of UNITY among all MALAYSIANS. Anyway, the election is now over, and it's time to get back to life and hopefully our future will be a Bright one.

Oh yes, we had a trip to Legoland before the election - my husband hometown is in Johor, so we went back a few days earlier to spend some time with Grandpa & Grandma. Will upload some pictures later :)


And something i sew up recently,


Yeah... it's another zipper project for me. I decided to make a big pencil case, so i can chuck all my daughter's colour pencils and crayons IN! At first, i thought of an Orange design but then on second thought, a Watermelon would be easier. =P


I uses felt and the lining is some scrap fabric i found from my mom's stash..hehe :)
the stitching is a bit rough ( i'll try to improve in future projects !)

Polka dot lining


Saturday, 30 March 2013

Holidays Stuffs ^^

Hi Hi gals!
Just been back from a holiday...and a tiring one!
So this post will be a quick update on a few items that was done before the holiday.
Well, i should have post this earlier but really didn't have the time and Big Ray was down with fever just a few days before our flight (oh gosh! that just got me panicking!!!)
Fortunately, she got well a day before our flight... =)

Okie, so here goes the list...


Fabric Belt
Make these fabric belt for Big Ray & Little Jay so that their jeans would stay put hehehe...
I would prefer toddlers to wear something with elastic and require no belts (easier for mommy to change their diaper) but since the weather is a bit cold i decided to let them have a few pair of jeans around.


Passport Holder


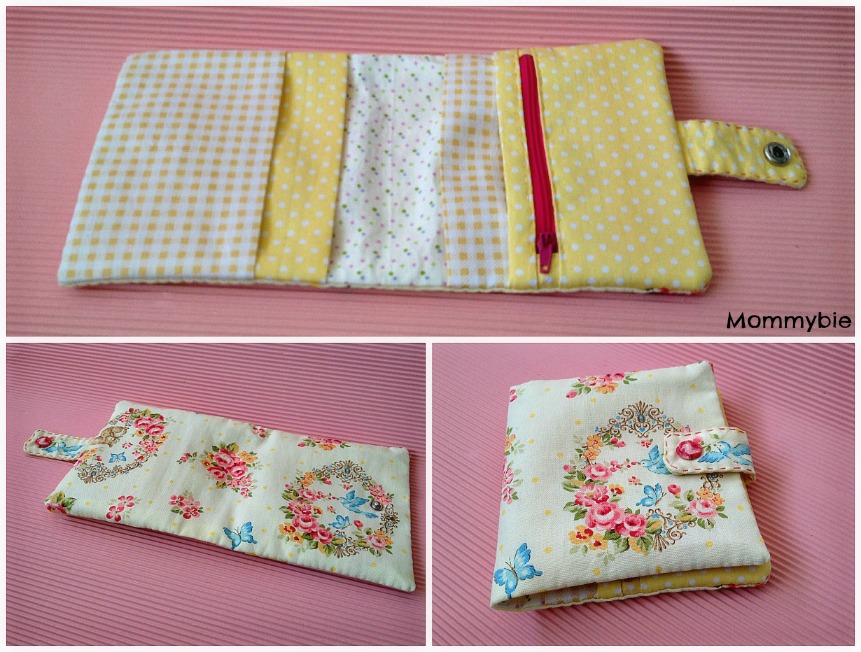
This is the first ever passport holder that i make with 4 slots and a little zipper pocket to keep some money & coins. All these while i've never use a passport holder but since i'm travelling with my 2 gals along, i'll need this to keep our passport together. I really loved the fabric and the out come of this holder but Silly Me, i miscalculate the seam allowances and MY PASSPORT COULD NOT FIT IN! Can you imagine how i felt then? ... =(

After spending the whole day with my mood turned to cloudy, i took out my stash of fabric and look for some materials to do a new one. And this time, i'll make sure i get the right measurement. And so this was it, my passport holder.


It was a combination of yellow & grey colour.  I think this was lovely too and the most important thing is - it fits the Passport. ^^ (I did not iron it beforehand hehe... so it looks so wrinkly)


Luggage Tag


Tadaa... aren't these luggage tags cute? I saw lots of fabric luggage tags tutorials on the web but i wanted something cute and bright so i ended up with these. I used felt for all of them except for the red matryoshka doll which i added a fabric as the dress ( it's pretty easy, just wrap a piece of fabric around the felt with fabric glue and sew them together). The transparent slot is actually book wrapper -  i bought the thicker plastic type from Popular Bookstore. Big Ray loves the Hello Kitty one. I actually put some poly fiber fill in the hello kitty one but the result is not as good as the flats one because the slots behind seems like 'puff up' if you notice from the picture below.


No-Knit Scarf


This was actually from a tutorial i found from Martha Stewart Crafts website. If you are interested, you can find the tutorial here. As i don't know how to knit, this was the next best thing to do. I think i can handle knots much better than knitting and i love the outcome of it ^^ .


I bought a ball of yarn from Daiso. Well, i did not follow the exact measurement because i don't have enough yarn so i basically divide them accordingly. Lucky me, it suits a toddler just nice.


And for the process of tying the knots, i hung up the yarn instead of laying them down which i find easier. (hehe... those hangers are  really old stuffs)  The first few knots got me thinking if i'm doing the right thing but trust your instinct, you'll get the hang of it after a while.


Thermometer Pouch


I always carry a thermometer whenever my gals are going for balik kampung or any trips which required more than 1 day. The original pouch was spoilt - the zipper came off  so i cut the pieces up and make one my own.


Notice the zipper part which was torn? It actually have me cracking up my head a bit sewing this pouch because of the curves and again i did not allocate enough seam allowances. Thus the pouch was a bit out of shape i guess...but fortunately, the thermometer still managed to squeeze in! Whew!


That's the front view in the picture above and the inside lining (picture below). I think i'll do this again sometime in the future - and to get the right measurement.


Well, that's all for this post. Next , i'll be posting about our holiday trip to China. See ya ! ^^


Thursday, 28 February 2013

little zipper pouch


I haven't try sewing a zipper before and thought that it would be tough and troublesome. But i would like to try it someday, so i did some homework and go through a few tutorials and try this little zipper pouch. I'm so glad that it turn out well and the zipper wasn't so hard to sew after all. The purple colour felt pouch was for my elder daughter to play with. She loves to play with Daddy's wallet and Mommy's purse nowadays so i thought I'll get her one. She's happy with it =)

Below is one i tried sewing using scrap fabrics and i love it! I'm keeping this for myself and will be making more pouches. They are so handy and i have lots of things to keep with them.


Tuesday, 5 February 2013

CNY Blooms

My previous post was about flowers... and so was this one! I've decided to make a bouquet of little flowers using the ideas I saw on Facebook sometime ago.


Aren't they sweet? It is simple to make as well.
First of all, gather the materials. I searched around my house and found these:


1. Felt according to your colour choices
2. Cotton Twine
3. Steel Pin with Pearl
4. Plastic Container
5. A ball of fiber stuffing - i found a softball that fits perfectly :)
6. Matching threads, Sewing needle, Craft Glue (picture not shown)

To make the "vase" wrap the cotton twine around the plastic container using craft glue. Do Not leave the container up while wrapping. You don't want the cotton twine to come off at the bottom as you press them down firmly during the wrapping process. It may feels messy at first but don't worry, you'll get the hang of it after a few rounds. Below is the picture of how i did mine.


As for the flowers, i did mine using a 20 cents coin as my template. Each flower will need 4 frilly circles and 1 plain circle. To get the frilly circle, just draw some frills around the circle  and cut accordingly. Then take the first frilly circle and fold them in half and half again. Place them on the plain circle and sew a few stitches. Repeat with the other 3 frilly circles. Add a few more stitches to secure it and knot it underneath. Voila, you'll get a cute little flower. 
Next,push a pin through the middle of the flower and you are ready to arrange your flower on the fiber stuffing. I added 2 leaves (just to inject some green into it) which is very simple too. Cut a larger and a slightly smaller leaves and sew them to the back of your flower. Or you can pin it like your flower too. Hope the pictures helps.


Well, that's just about it. Pretty easy right except the cutting part..hehehe
Anyhow, I'm happy with the results. Maybe I'll do some other flowers next time. For the time being, this will seat  nicely in my living room. Happy Chinese New Year everyone!


Tuesday, 29 January 2013

Flower Power

I have gone crazy over flowers these days...fabric flowers & felt flowers that is. Tea Rose Home and Craftiness is not Optional have some really awesome tutorials on fabric & felt flowers. Below are some that i have made.

Fabric flowers that most probably will end up as my hair band.

 A flower brooch for my daughter.

 Some felt flowers - the top Red Peony Flower is from yoonie-at-home

Fabric flower headbands for my daughters.

Tuesday, 18 December 2012

alphabet magnets


ABCDEFG.... XYZ
Made these felt alphabet magnets for my 2 year old. Thought it would be fun for her to learn alphabets. Well, they end up scattered everywhere... and mommy busy searching high & low to keep track of all 26 alphabets !

Wednesday, 29 August 2012

Birdie HDD Cover


After seeing the Totoro IPad Cover, my sister asked for a hard disk drive cover.
And after some browsing, i decided on this birdie pattern felt cover with a pocket
for the cable at the back portion.
Whew...another successful project for the beginner sewer me. I think I am starting
 to get bitten by the sewing bug. Oouch!

Sunday, 24 June 2012

Totoro Felt Ipad Cover

Tadaa... this is my favorite handmade item that i've made so far - my Totoro Felt Ipad Cover.
Get the idea from this Totoro picture


and after a few days of measuring, cutting and stitching... it's finally done!
Just love it! Hubby also compliment -"it's so cute".
Happy, happy happy ... =D


Friday, 25 May 2012

felt book cover

I saw lots of book cover while blog-walking and feel like making one for myself;
and there i went going through the craft e-books & tutorials before landing my self
on this easy felt book cover project (hehehe...beginner level)
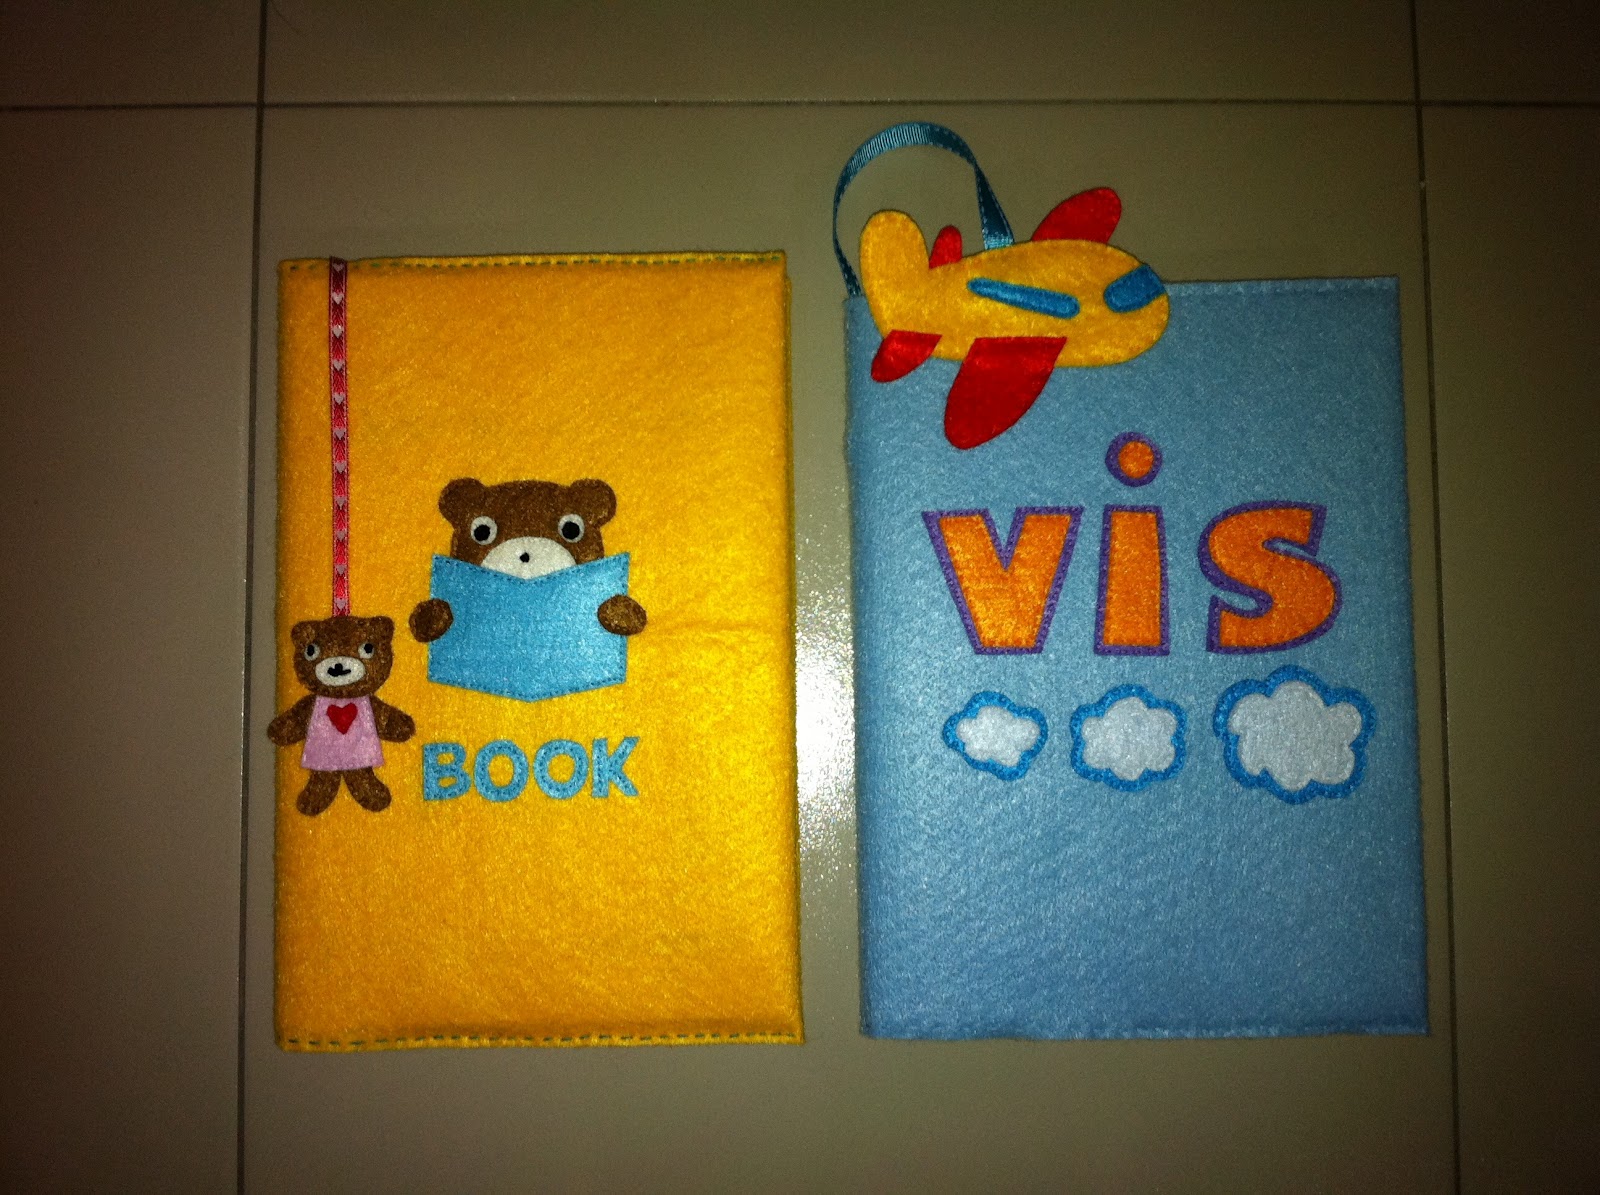
First get my 'favourite book' then wrap the felt around it to get the measurement.
Next, copy the bear pattern onto the felt & cut, cut, cut all the felt pieces.
Finally stitch them up.
Tadaa! my "bear Bear" felt book cover is done. Then show it to hubby hoping
to get some compliment - it's cute. Well, well, happy me offer to make him one too.There i go again repeating the whole process but this time with a different design & an airplane bookmark attached. I show it to hubby his new book 'cover' and the compliment this time - Nice, er..but a bit kiddo.
My reply- You are a Big Kid. Smile.


Saturday, 7 January 2012

Charms for little ones...

I manage to sew a few charms for my little nieces. Hope they like it  =)
The mushroom & Domokun is my favourite..hehe 


Tuesday, 6 December 2011

Little Bear 2 & Booties...

I've made the 2nd little bear for my youngest baby daughter plus baby booties too..Though the result isn't very good but mama will keep on practicing and make more stuff for you gals. :) Love ya!

 this is the first pair that i tried making, using only felt


 and my second attempt which is slightly bigger &
i also add in the anti-slip cotton fabric as the base