Tuesday, 17 December 2013

Green Bear Is Here!

Here comes the Green Bear for Big Ray!


She loves green colour and picked this darker shade herself. She also choose the little green heart
buttons instead of the Mickey button (the one on Little Jay's Bear)  ^_^


And the happiest moment...watching your child beaming with laughter and enjoying your 'work of love'!
Ciao!

Monday, 11 November 2013

Pete Bear Free Sewing Pattern from Abby Glassenberg

Hi Hi... ^-^

Today i want to post about this little bear pattern i found from While She Naps (a blog on designing & sewing stuffed animals). His name is Pete. Here is the bear that i made using this pattern for my Little Jay.

                                                                    the Pattern Pieces


                                                       My sewn up version of Pete Bear


                                        and a Mickey button to make Little Jay happy  >.<


Isn't he adorable? Big Jay is requesting for a Green one... I'm gonna post that up when it's done.
If you wish to sew one for yourself or your kiddo, get the free pattern here.


Friday, 8 November 2013

An Ipad Cover Not...


I bought this cute little car fabric some time ago and it was on sale! Lovely! I didn't know what to do with it at first, but i shall keep it till the right time comes... and here it is - an Ipad Cover.
However, due to my silly mistake of miscalculation, it was a tad smaller than my Ipad !!! Oh gosh, how can i let it happen again? I guess my batting has taken way too much space than i thought.


 Here's the front look - i added a zipper pocket to keep some small stuffs (my first try at sewing Ipad cover with zipper pocket and i love it!)


And the back - cute cars!


The front cover flap was secured with a Velcro tape.


The lining - stripey brown and white lines.


This cover shall now sits in my little gallery (my cupboard) waiting - i believed someday his service will be needed. Perhaps hubby will need to get a new tablet in the future? =)

Now, what shall i make with the Red version of this cute car fabric? Oh yeah, i did mention it was on sale right? I can't stop myself from buying it... hehehe  =P


Thursday, 17 October 2013

Green Tea Ice cream... Yummy!


Today i would like to share an ice cream recipe which i saw on Facebook. This simple recipe is from Aeri's Kitchen . She made this recipe for those who don't have an ice cream maker at home (haha.. i'm one of them). You only need to use milk, heavy cream, sugar, egg yolks & green tea powder ( i guess you can change to use other flavor - coffee or chocolate perhaps? ) Plus point, she boils the egg yolks under low heat so its safer for consumption.

The texture of the ice cream is harder than the store bought type but i really loves the taste of this ice cream - it has a mild milky taste and nice green tea flavor.

Do give this recipe a try if you like ice cream - it's a healthier choice and delicious too!


(Aeri shares lots of Korean recipes on her blog.)

Friday, 20 September 2013

Sweet Memories

I have been scrolling through some old photos while transferring some new ones into my desktop and found myself laughing and smiling looking at them. Photos sure does bring back those sweet moments. It also reminds me of how time flies and how fast my baby girls have grown to be toddlers now.

Baby Little Jay

Little Jay

Baby Big Ray with Cousin Ejae

Big Ray

And they are now toddlers...
Little Jay in a 'just woke up' look

Big Ray & Daddy

Happy Little Jay on a train ride

Big Ray with Cousin Eshuan at Grandma's Birthday

Little Jay, Big Ray & Cousin Ejae

I will cherished these moments with me forever. Love you all! Muacks!

Monday, 26 August 2013

Felt Photo Frame


Today, I'm going to post about my newly done project - magnet felt photo frame. I have always wanted to try this and am so happy with the outcome  (^_^) that i make another one right after i finished the first one. Here's how i make them...


 1. Cut 2 pieces of felt - according to the size of your photo. My photo was an A4 size so i added
     another 1 inch around the photo as the frame border.
 2. Then on 1 piece cut out the middle part slightly smaller than the photo so that the photo will
     stay put. This will be the front piece.
 3. Using craft glue, i glued a transparent cover (can be found at any bookstore ) onto the front
     piece. ( Notice that the hole is slightly smaller than the A4 transparent cover )


4. When the glue had dried, put the front and back piece together ( the side showing the glue face
    inside ) and sew the sides as shown by the yellow dotted lines. This is to ensure that the photo
    will stay in place. Sew up the other 2 sides but only on the front piece so you will have an
    opening to insert the photo later.


5. Next is the fun part - assemble the little designs that you want! I've cut out pieces of felt
    to make a bus, plane, hot air balloon, trees, heart shapes and little clouds. Sew them on the front
    piece. Lastly, sew up all sides except your opening to insert the photo of course and glue some
    magnets to the back.


This is how it look like when done.


I also did a flower one with a little bee and ladybug as shown below.


Loved them! ^.^


Tuesday, 30 July 2013

"Mommy feed you"... & "Feed Mommy"...

These are the 2 sentences that i hear everyday from my 2 little gals. Big Ray who is going to be 3 years old next month can't differentiate the word "YOU", "YOUR" and "ME".


She often said,
- "I want Mommy feed you" instead of 'I want Mommy feed me'

- "Popo (Grandma) take out your pampers" instead of  'Popo, take out my pampers'
   (which my mom always replied with a big grin  =)  - I don't wear pampers!)

- "Daddy play with you! Daddy play with you! instead of  'Daddy play with me'

and many more funny phrases. She's picking up what people said to her and well, sometimes i'm surprised by what she said.


As for Little Jay, she's picking up quite fast too. She can say short sentences like "I want drink", "I want play" and the cutest of all - "Feed mommy" instead of  'Mommy feed'. Also, if you bring her something that she doesn't want she'll keep on saying "no,no,no,no,no". I'm trying very hard to get her to say 'yes,yes,yes,yes,yes'  (>.<)

Watching them learn to speak was quite fun, especially when both of them are speaking their own gibberish language (it's like watching the minnions, haha) And the best of all is you can actually understand what they are trying to tell you even they pronounce the words wrongly. My husband will always ask me to translate when he doesn't get what his daughters are saying, so do my mom and sis. Guess, this is part of the Joy of Motherhood.


p/s: these photos were taken during a recent trip to Teluk Cempedak, Kuantan. Nice & beautiful sandy beach they have and it is much cleaner than Port Dickson.


Monday, 8 July 2013

Stool Cover ^.^

There are so many things that i wanted to sew/make after blog walking to various crafts blogs. The list is never ending! it just keep on growing!!

Anyhow, this stool got the priority first because it really need some touching up (notice the fabric sticker at the middle part?) Yup, it had a small hole courtesy of my eldest daughter and then it just grows... at first, i only used half a patch of the fabric adhesive but now i need to use 2 patch of fabric adhesive. On top of that, Big Ray and Little Jay loves to dig out the fabric adhesive - toddlers!
So i guess the best thing to do is to sew up a cover for the poor stool.


I've been wondering what type of cover shall i make? one with applique or a plain one? and i settle for this little patchwork. Well, this is my first time trying the patchwork stuffs so i just did a few blocks. I really admired those peoples who sew quilts and paper piecing stuffs. So much details and hard work goes to each piece of their works. I don't think i have that type of patience (heheheh)...


And for the reverse side, i have choose a purple paisley design fabric from my stash of fabrics (which my mum had thrown out - hehe i collect small pieces of fabrics which my mum doesn't want anymore ^.^ )


I personally prefer the purple side. Guess i need to to practice on my patchwork more!
My sewing skills are just so so, but i believe someday I'll get better ~ with lots of practices of course.
And a millions thanks to all crafts bloggers out there in the world wide web that put up so many tutorials and tips to help out people like me - Thank You ! =)

Thursday, 20 June 2013

Reversible Toiletries Bag

bag pattern cut out
Aha, this was one project that got me a headache. Seeing so many reversible bag out there, i would like to try making one myself. So without much thought, i just cut a simple bag pattern from 2 scrap fabric ( notice the pattern is like our normal plastic bag ). Next, there's where my headache start - How to sew them? I tried many ways and there will be certain part i got stuck. Yikes, i should get a tutorial somewhere first! Anyhow, after reading through quite a few of tutorials on reversible pattern, i managed to complete this project - though the methods may not be right...

Polka dot bag
I added a pocket for my husband phone. He never fails to bring his phone into the washroom.
What a boy!

Paisley bag

Wednesday, 22 May 2013

LEGO Land !

Hmm, I did mentioned in my previous post about our little trip to LEGO Land and today I'll put up some photos. It was a sunny turned cloudy day and you can see from the photos  - the big grey clouds. But still, it was so hot.


              (L) Who's that Uncle sleeping over there? (R) Mommy taking a picture with Grandpa Lego.


 Granny Lego feeding Lego pigeons??


And guess what? they have a Nissan Driving School for kids! Though big Ray & little Jay are too small to drive, they still get to enjoy some fun time on this cute little LEGO car.


Cooling down with an ice cream treat from Daddy! Thanks Dad =)
( Toddler/Kids stroller are available for rent at RM30 (single seat) & RM45 (double seat). Wheelchairs are available too! )

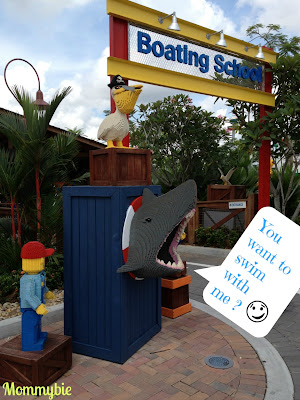
 Learn to navigate a boat here.


Below are pictures of beautifully constructed miniature landmarks. It was awesome! Those designers or should i said builders are really great...they have put in a lot of efforts, passion and heart  (yeah , you need to love what you do) to be able to do such wonderful works. Just look at all the details... =)
Can you recognize these landmarks?


The pictures that you see here is only part of the display. I did not manage to take photos of the rest. The place was big and my two girls was excited to venture into other part of the theme park so we thought of coming back later. However, we eventually played till the park closed - at 6.30pm!


Haha..Pity this Lego guy up there... =P


It was a fun day and it's great to be able to play like a child and the most important is spending quality family time together. What i can say now is - I'll be back with my kids! We are sure to visit Lego Land in the future =)
See ya!